On this page:
Once you have a new Data Marking Category created, you need to specify the Data Markings denoting the classification that you want to have for it.
Important
If you create, reorder or delete Data Markings, ensure that you:
- Refresh the diagram (click F5 on the keyboard or click View > Refresh in the tool) to see the changes on the element portion markings.
- Update the Diagram Banner to see the changes in the Diagram Banner markings.
Creating a new Data Marking
To create a new Data Marking
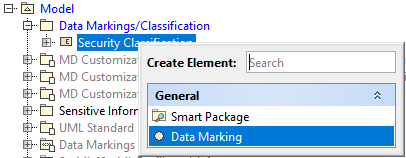
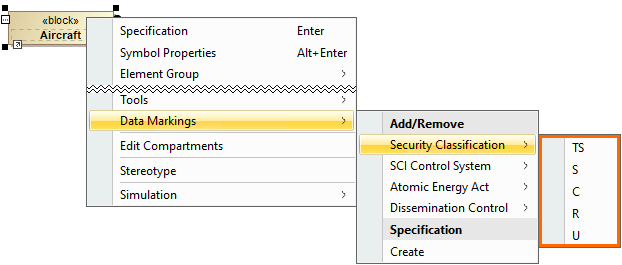
- Right-click the Data Marking Category element and do one of the following:
- In the shortcut menu, click Create Element > Data Marking. Specify the name for the newly created Data Marking in the Containment tree.
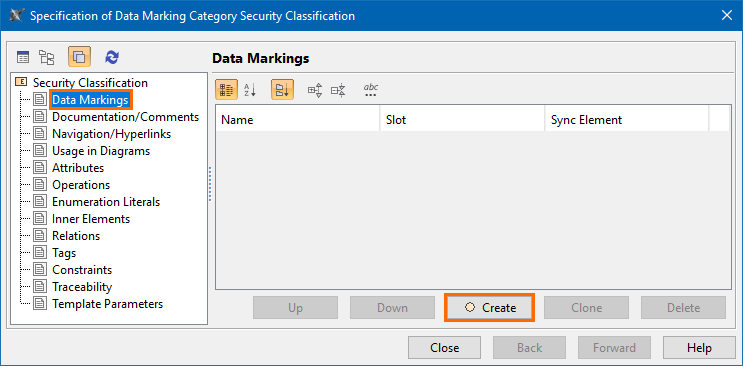
- In the shortcut menu, click Specification.
- In the Specification window, select the Data Markings property group.
- Click the Create button.
- Specify the name for the Data Marking in the Name field. A new Data Marking is created for the category in the Containment tree.
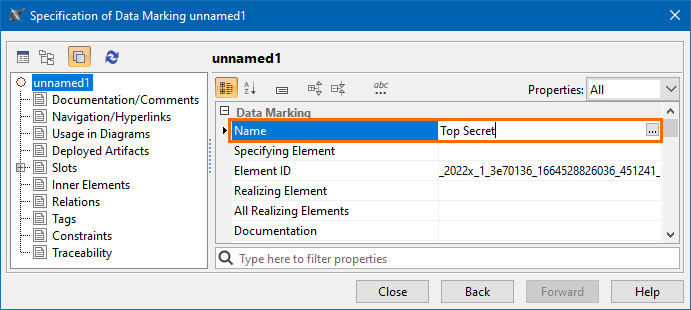
- In the shortcut menu, click Create Element > Data Marking. Specify the name for the newly created Data Marking in the Containment tree.
- Specify the Data Marking representation attributes for the new Data Marking.
- Repeat steps 1-2 to create additional Data Markings for the category.
- Click Close.

Reordering Data Markings
The order in which the Data Markings are listed within a category specifies their level of importance and determines the order in which the Data Markings are displayed in the Data Markings shortcut menu. In combination with the Data Markings' Rankings value, it also determines the display of portion markings on the elements of the project and the banner markings on the Diagram Banner. Learn more on the Specifying Data Marking rankings page.
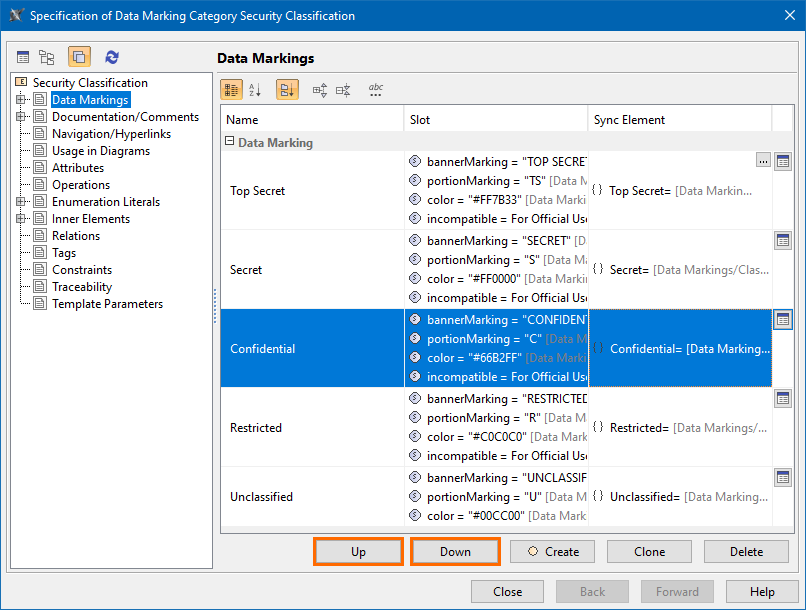
To reorder Data Markings
- Right-click the Data Marking Category element and open its Specification window.
- Select the Data Markings property group.
- Select the Data Marking and click the Up or Down button to move the Data Marking.
Click Close. The Data Markings are displayed in the Data Markings shortcut menu based on the specified order.
Editing the Data Marking name
To edit the Data Marking name
- Through the Data Marking element, do one of the following:
- Click the Data Marking element twice and edit it.
- Right-click the Data Marking to open its Specification window. Edit the Name field.
- Through the Data Marking Category element:
- Right-click the Data Marking Category element and open its Specification window.
- On the left-side menu of the Specification window, select Data Markings.
- Click the Data Marking and edit it.
- Click Close.
Deleting a Data Marking
To delete a Data Marking
- Through the Data Marking element:
Right-click the Data Marking element and click Delete in the shortcut menu.
- Through the Data Marking Category element:
- Right-click the Data Marking Category element and open its Specification window.
- On the left-side menu of the Specification window, select Data Markings.
- Select the Data Marking and click the Delete button.
Click Close.