You can set up custom announcements in the Settings application and show them when users log into the server or open specified resources. Displayed both in a modeling tool and web applications, these notifications are a convenient way to announce early server upgrades, project deadlines, or any other organization-specific information.
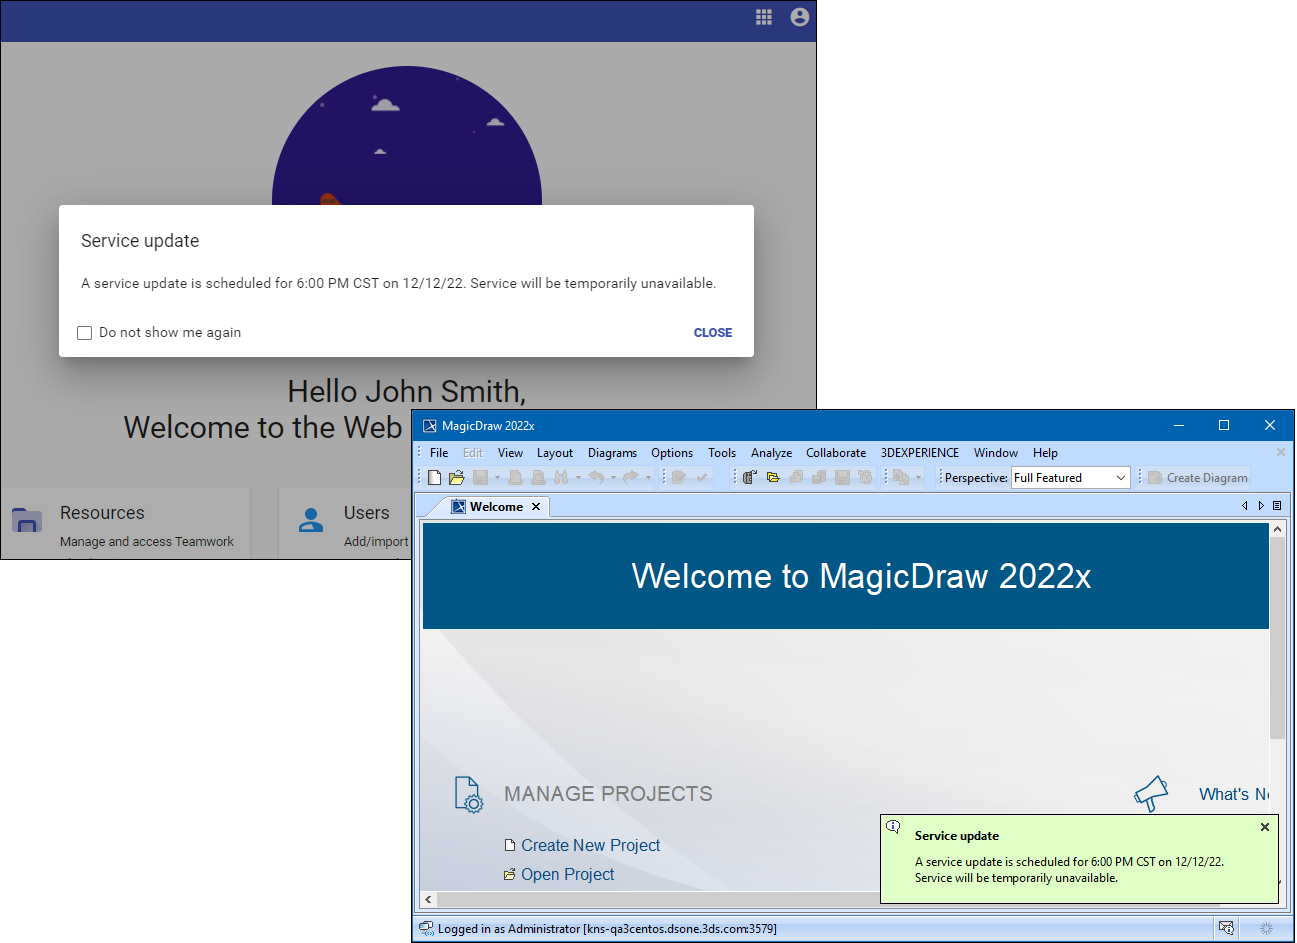
Announcement displayed in WebApp and modeling tool.
Creating announcement
To create an announcement
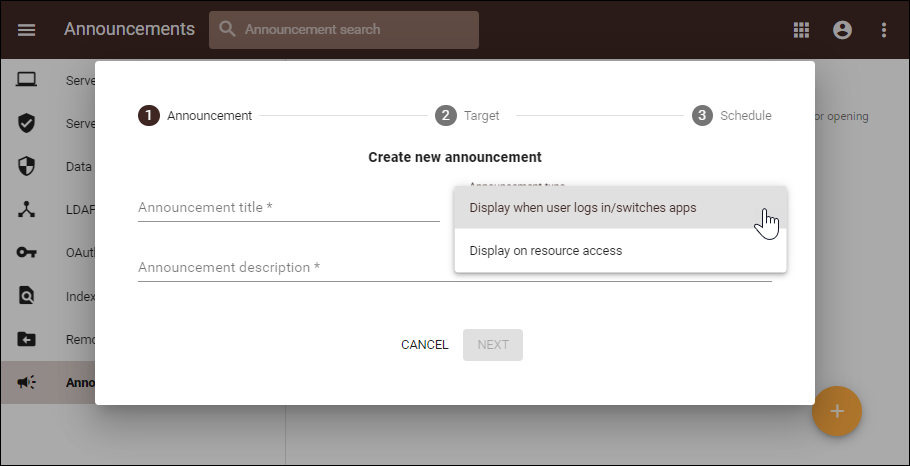
- In the left-side menu of the Settings application, select Announcements.
- Click
 on the bottom right corner of the screen to create a new announcement.
 - Enter the title and description of your announcement.
- Choose the announcement type.
- Display when user logs in/switches apps: announcements of this type are displayed when a user logs into the server from a modeling tool or web application.
- Display on resource access: these project-specific announcements are shown when a user opens a project.
- Click Next.
- In the Target box, select the target of the announcement, i.e., the users and/or groups who need to see the announcement or the resources on which the announcement is to be displayed.
- In the Schedule box, choose the schedule to display the announcement. If you do not choose a schedule, the announcement remains active until manually deleted.
- Click Create.
Viewing announcement details
You can view the details of an announcement on the Announcements page of the Settings application. The following information is available on this page:
- Title: the title of the announcement.
- Description: the description of the announcement.
- Scheduled: the period that the announcement is scheduled to be displayed. If no schedule is set, this column shows Permanent. This means that the announcement remains active until manually deleted.
- Status: the status of the announcement. There are three possible statuses:
- Scheduled – this means that the announcement is yet to be displayed.
- Active – the announcement is currently displayed because the current date and time fall into the scheduled period or the announcement is permanent.
- Expired – this means that the scheduled period has passed and the announcement is no longer active.
To view even more details of an announcement, such as its type and target, click the announcement.
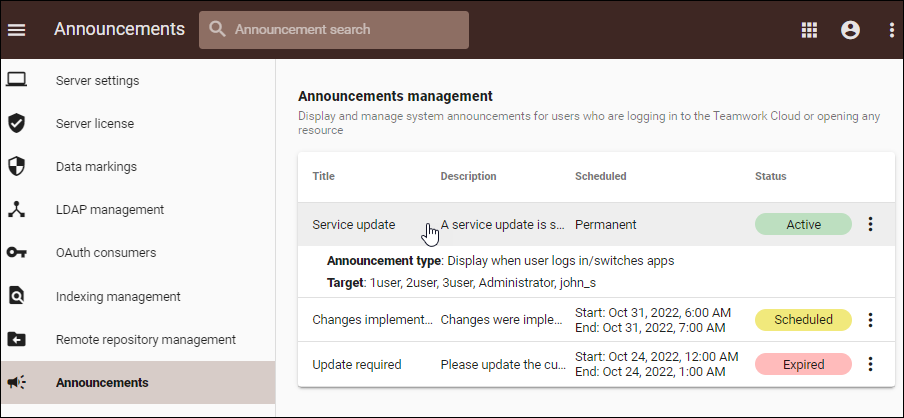
Viewing announcement details.
Editing an announcement
To edit an announcement
- In the left-side menu of the Settings application, select Announcements.
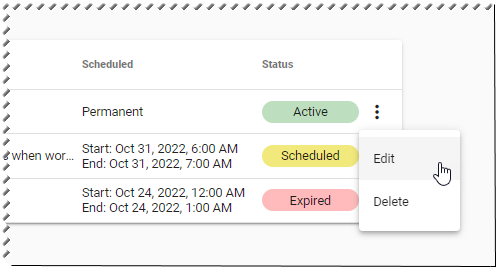
- Click
 on the right of the relevant announcement.
 - Select Edit.
- Edit the required information in each box and proceed by clicking Next.
- After you have finished editing, click Save.
Deleting announcement
To delete an announcement
- In the left-side menu of the Settings application, select Announcements.
- Click on the right of the relevant announcement.
- Select Delete.
- Click Delete in the dialog to confirm.