You can specify the scope in the table Criteria area for every table.
To specify the scope
- In the Criteria area of the table, click the ... button next to the Scope (optional) box.
In the Select Scope dialog, select one or more containers, such as packages or smart packages, and add them to the Selected Elements list.
The Select Scope dialog is a modification of the element Selection dialog.
Click OK.
The scope is defined, and the contents of the table are updated with the elements from the selected scope. In the future, all elements created in that scope will automatically be added to the table.
Alternatively, you can select one or more elements directly in the Model Browser and drag them to the Scope (optional) box, as shown in the image below:

If the contents of the table have not been updated, try the following:
- Click
 on the View toolbar, in case a smart package is specified as the scope criteria.
 - Make sure the specified scope contains elements specified in the Element Type box, Metric Suite box, or Classifier box.
- Make sure at least one element is specified for the table.
In addition to specifying the scope for the table yourself, you can set the expression to collect table elements automatically.
To specify the expression to collect row elements
- In the Criteria area, next to the Scope box, click the
 icon.
icon. 
- Once the Query dialog opens (see an image below), select Custom from the list of available query criteria.
- Specify the desired expression to collect elements for your table automatically.
- Click OK.
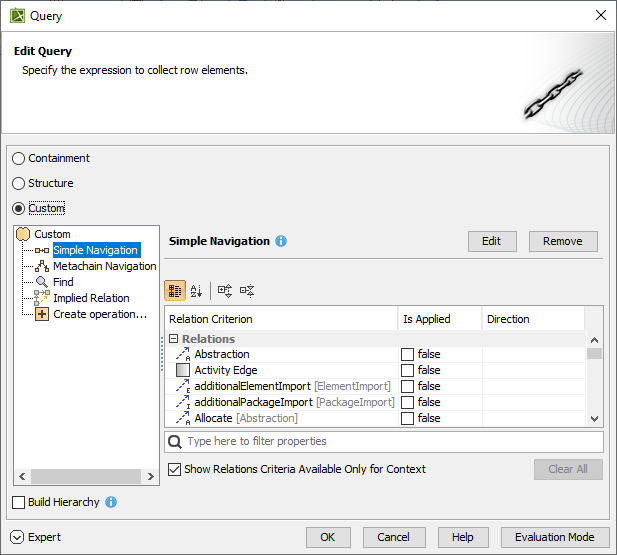 Specifying the expression in the Query dialog