These set of instructions will explain how to choose Forecast Kinds and how to specify their values.
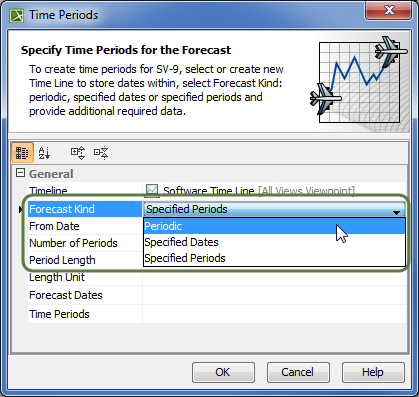
There are three types of Forecast Kind:
- Periodic - to divide the forecast into equal periods.
- Specified Dates - to divide the forecast into specific dates.
- Specified Periods - to divide the forecast into specific time periods.
To specify Periodic Forecast Kind
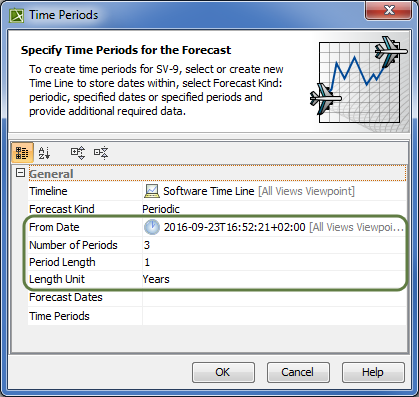
- Select Periodic as the Forecast Kind.
- Specify From Date by doing one of the following:
- Click , or Alt+Down, and select an already existing date from the list.
- Click , and select a date from the opened Date and Time Settings dialog.
- Specify forecast periods in the Number of Periods field.
- Select Length Unit: Years, Months, or Days.
- Specify Period Length of the forecast according to the Length Unit.
An Example of a Periodic Forecast Kind.
All data defined in the Time Periods dialog is displayed automatically in columns for each period.
Example of Periodic Forecast Kind in the Model
Specified Dates
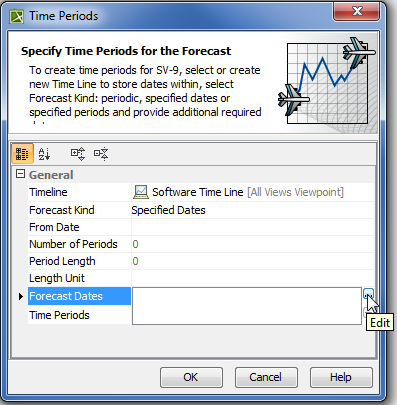
For Specified Dates Forecast Kind, you only need to specify the Forecast Dates. The previous fields are uneditable.
To specify Specified Dates Forecast Kind
- Select Specified Dates as the Forecast Kind.
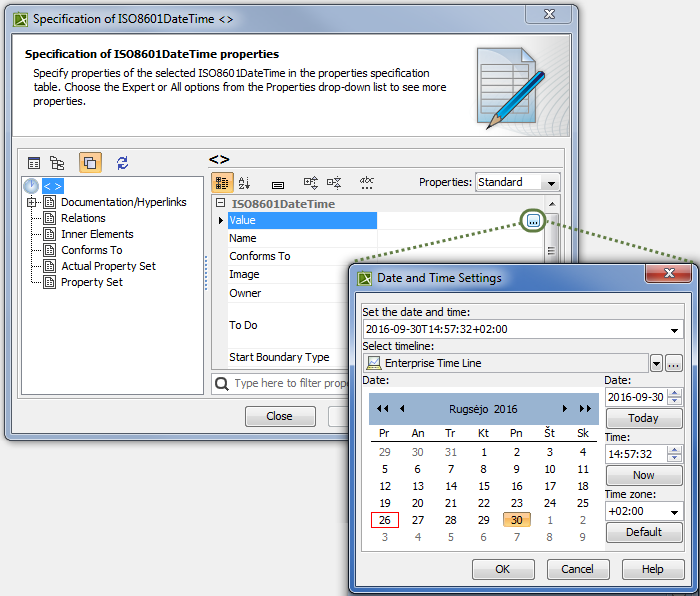
- Under Forecast Dates, click to open the Select ISO8601 Date Time dialog.
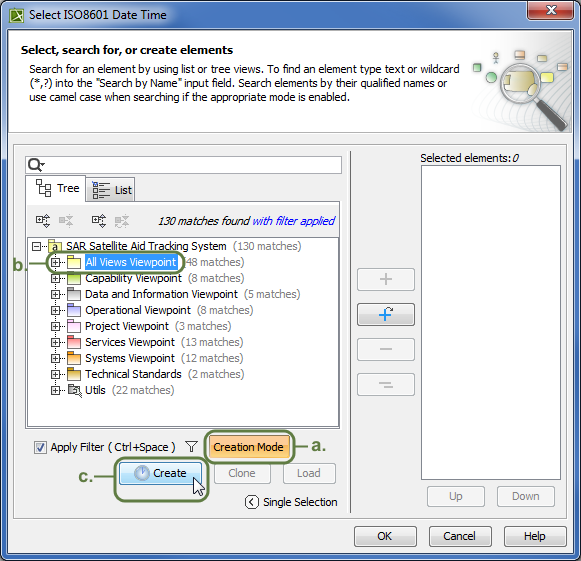
- Select the existing ISO8601DateTime element (date) from the List. You can create a new one by taking the following steps.
- In the Select ISO8601 Date Time dialog, make sure Creation Mode is on.
- Select the appropriate package from the list in which you want to store a new ISO8601DateTime element (date).
- Click the Create button. The new date element's specification window opens automatically.
- In the Value field, click , and select an appropriate date from the Date and Time Settings dialog.
- Click Close, or create more dates by repeating steps c. and d.
- Click OK.
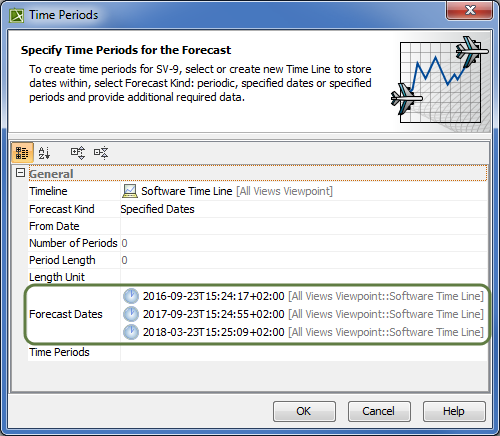
An Example of a Specified Dates Forecast Kind.
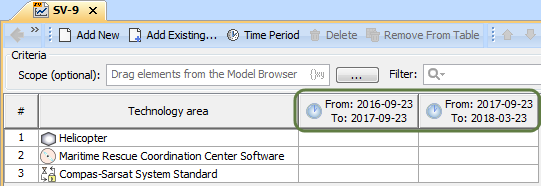
All data defined in the Time Periods dialog are displayed in columns in the table. In this case, three dates (2016-09-23, 2017-09-23, and 2018-03-23) were automatically divided into two columns (from 2016-09-23 to 2017-09-23, and from 2017-09-23 to 2018-03-23).
Example of Specified Dates Forecast Kind in the Model
To specify Specified Periods Forecast Kind
- Select Specified Periods as the Forecast Kind.
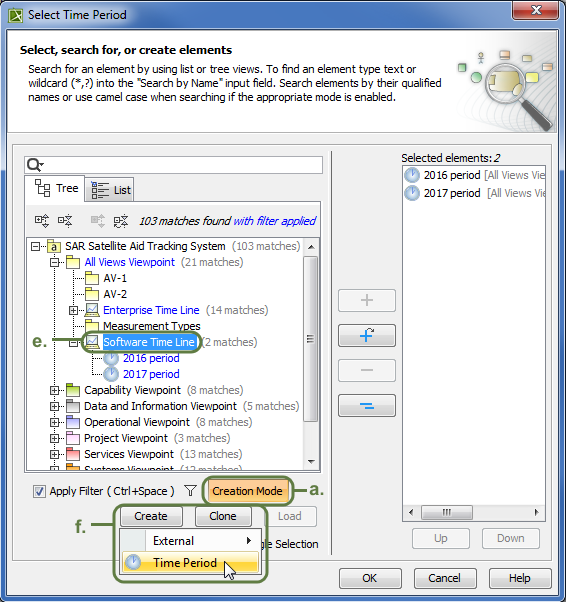
- In the Time Periods field, click to open the Select Time Period dialog.
- In the opened dialog, you can do the following:
- Click the Tree button and expand the tree until you find an existing Timeline element () with existing , and double-click on each one. Skip to Step 4.
- Click the List button and double-click each existing Time Periods (). Skip to Step 4.
- Create a new Timeline element with Time Periods. Here's how:
- Ensure that element Creation Mode is turned on.
- Select the appropriate package from the list in which you want to store a new Timeline element.
- Click the Create button. The Specification window of the newly created Timeline opens automatically.
- Type a name for the new Timeline, and click Close.
- Select the newly created Timeline element.
- Click the Create button, and select Time Period. The Specification window of the newly created Time Period opens automatically.
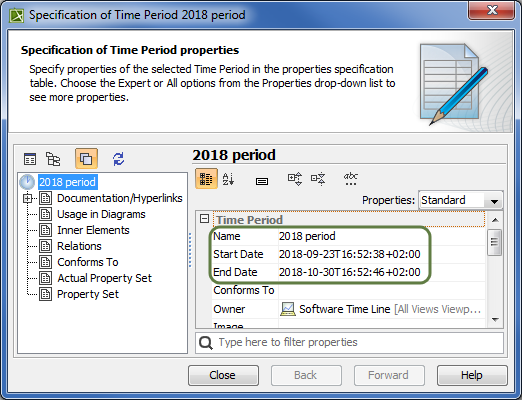
- Specify a Name, Start Date, and End Date.
- Click Close.
- Click OK.
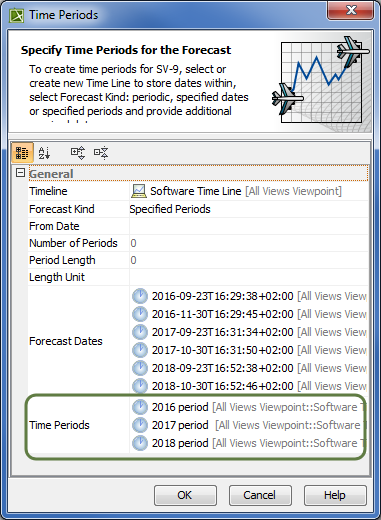
Example of a Specified Periods Forecast Kind.
All time periods defined in the Time Periods dialog are displayed in the table as columns. In this case, three periods (2016 period, 2017 period, and 2018 period) with their specific start and end dates were defined and displayed as columns in the SV-9 table.
