On this page
Introduction
You can transfer data between Excel/CSV files and modeling tool tables. After sync, the data on the Excel file of the selected sheet or CSV file matches the data in the modeling tool table. This mechanism is bidirectional and ensures continuous work between Excel/CSV files and modeling tool tables. If you don't have the ability to collaborate via the internet but you need to share information through Excel or CSV files, you can use this feature. The Excel/CSV file syncing is available in all tables of the modeling tool by using the Excel/CSV Sync button ![]() in the table toolbar.
in the table toolbar.
Preparing Excel or CSV files to sync
To sync data from Excel or CSV files, the files must meet the following prerequisites:
- The heading is located in the first row.
- When creating relationships, the spreadsheet must contain the source and target columns. The source and target columns contain the names/qualified names of elements respectively that are the client and supplier of the relationship.
Recommended prerequisites:
- Eliminate merged cells.
- Every column has a unique column name.
- Every row has the same number and name of columns.
Every cell has the element name or qualified element name.
How to synchronize your data
To synchronize the table with the Excel or CSV file
- Create a new or open an existing table.
- In the table Criteria area, select the Element Type or Classifier.
- Click the Columns button and select properties and/or slots to which you want to sync data from the Excel or CSV file.
On the table toolbar, click
 and then choose Excel/CSV File > Select File. In the Excel/CSV Sync Options dialog, select the Excel or CSV file either from your file system or from the model, if the file is already attached. How to attach the file to a project >
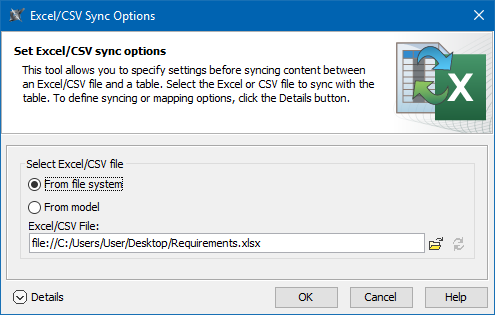
An alternative way to link Excel or CSV file to the table is to drag it onto the table, hold it down until the Tooltip appears (long drag), then drop it, and select either Link Excel/CSV File or Attach and Link Excel/CSV File. If you want to modify sync options, select on the table toolbar, click
,then choose Excel/CSV File > Sync Options and go to step 6. If you want to synchronize data instantly in the ordinal position, go to step 9.- If you select another file, e.g. Vehicle Requirements.xlsx on a modeling tool table that is already linked with the file, e.g. Stakeholder Requirements.xlsx, the previous file named Stakeholder Requirements.xlsx is replaced with the latest one Vehicle Requirements.xlsx.
- You can link only one Excel/CSV file with the same modeling tool table.- Click Details to expand the dialog.
The modeling tool might require refreshing the dialog before setting the mappings. Therefore, if you see this notification at the bottom of the dialog, click Refresh.
Before uploading the mapping of the older version to Teamwork Cloud, you need to recreate the mapping in the local project and resave it first.
In the opened Excel/CSV Sync Options dialog select options. Learn more about sync options >>
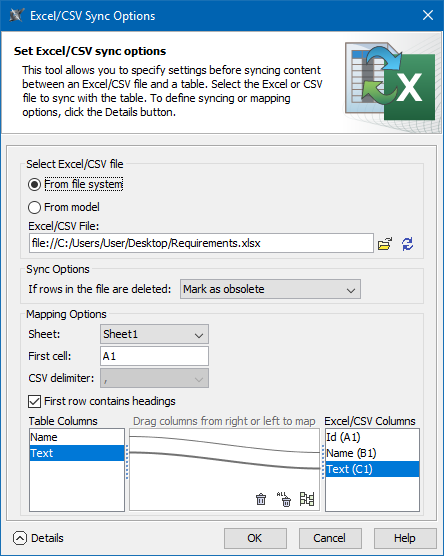
If you are importing requirements, they are first mapped by ID if the ID column is displayed. If the ID column is not displayed, then the requirements are mapped by name. If the name is changed, then a new requirement is created in the table.
- Click OK.
Import data from the linked file in one of the following ways:
- The notification appears on the down-right corner of the modeling tool window (see the following figure), click Read from File.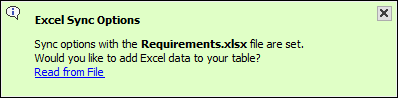
On the table toolbar, click and select the Read From File command.Read From File exceptions
After making any changes in the Excel or CSV file you must save them before using the Read From File command. Otherwise, the changes will not be imported to the modeling tool table.
Data cannot be imported or imported correctly if:
- The CSV file format is invalid.
- Cells are non-editable.
- Data types of columns are not compatible with source information.
- Columns do not support information updates.
- Elements with the same names but different types exist.
- The owner is not set or updated because this element does not exist in the model.
Also, some text formatting may not be transferred.
If you synchronize requirements, in the Select Type dialog, select the element you want to create in the modeling tool table.
Wait while data are imported into the table. The relevant notification displays in the down-right corner, when synchronization is completed. Items synchronized to the SysML requirements table appear in the Model Browser, too.
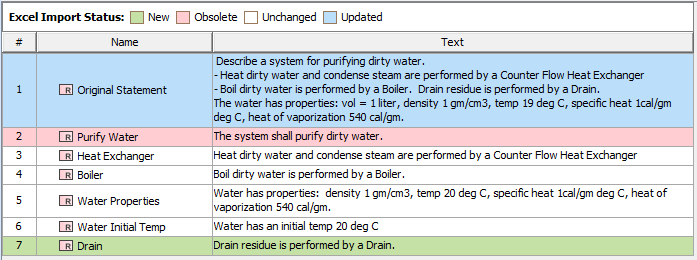
If you made changes in the file and saved them, the table Legend displays automatically and highlights the New, Obsolete, Unchanged, and Updated rows. In the figure above, the first requirement is updated, the seventh is newly created, and the second is deleted. All the items in the table are highlighted. The legend above reveals that all new items are highlighted like this. You can change the legend colors or hide the legend from the table. Learn more about legends >>
After making changes in the modeling tool table, export that data to the linked file as follows: on the table toolbar, click
and select the Write To File command.Write To File exceptions
The data cannot be exported or exported correctly if:
- The Excel file is corrupted.
The CSV file is open.
The CSV file is locked or you do not have the necessary permissions to access it.
The data is synchronized between the modeling tool table and Excel or CSV file.