The Active Create View Dialog allows you to manage all View Creation dialogs, determining which one should be activated for the project. The predefined SysMLViewCreationDialog configuration is activated by default for all SysML v2 projects. If you prefer using your custom-created View Creation dialog, you must activate it via the Active Create View dialog.

Only one View Creation dialog configuration can be activated for a project.

The Manage Create View Dialog command invokes the Active Create View Dialog, where the custom View Creation dialog's CustomViewCreationDialog configuration is activated for the project.

Activating the View Creation dialog

Once you activate a View Creation dialog configuration via the Active Create View Dialog, the active dialog's configuration is created in the model in a new root namespace.

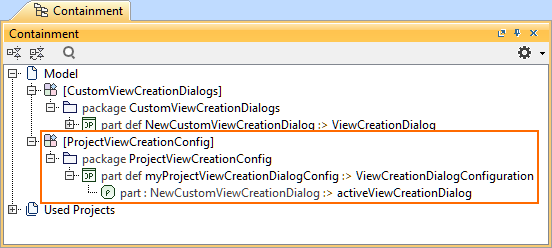
package ProjectViewCreationConfig {
    part def myProjectViewCreationDialogConfig :> DS_UIComponents::CoreUIComponents::Dialogs::ViewCreationDialogConfiguration {
        part : CustomViewCreationDialogs::NewCustomViewCreationDialog :> activeViewCreationDialog;
    }
}


Activating the View Creation dialog via the element shortcut menu

To activate the View Creation dialog via the element shortcut menu


  1. In the Containment tree, right-click the part definition element of a View Creation dialog configuration.
  2. In the shortcut menu, click the Manage Create View Dialog command. The Active Create View Dialog opens.
  3. On the left side panel of the dialog, double-click the dialog configuration you want to use. 
  4. Click the OK button. The selected dialog configuration is activated.

Activating the View Creation dialog via Project Options

To activate the View Creation dialog via Project Options


  1. Open the Project Options dialog and in the General group, click SysML v2.
  2. In the value column for the Active View Creation Dialog option, click the Browse button. The Active Create View Dialog opens.
  3. On the left side panel of the dialog, double-click the dialog configuration you want to use. 
  4. Click the OK button.
  5. Click the OK button in the Project Options dialog. The selected dialog configuration is activated.