On this page:
You can add selected Data Markings to your project elements, as well as remove individual or all Data Markings added to an element.
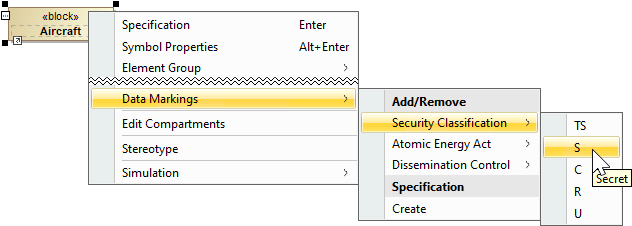
Adding a Data Marking to an element
To add a Data Marking to an element
Right-click an element or its symbol > select Data Markings in the shortcut menu > in the Add/Remove section, select the Data Marking Category > select the Data Marking you want to add.
The Data Markings in the shortcut menu are displayed as their portion markings.
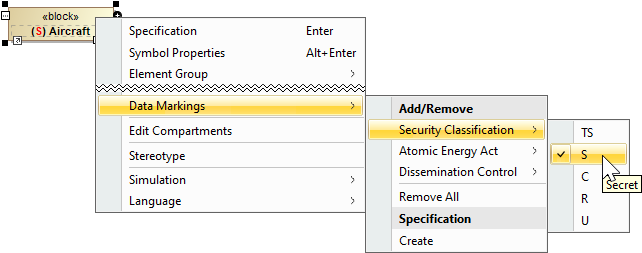
Removing a Data Marking from an element
To remove a Data Marking from an element
- Right-click an element or its symbol > select Data Markings in the shortcut menu > in the Add/Remove section, select the Data Marking Category > select the Data Marking you want to remove.
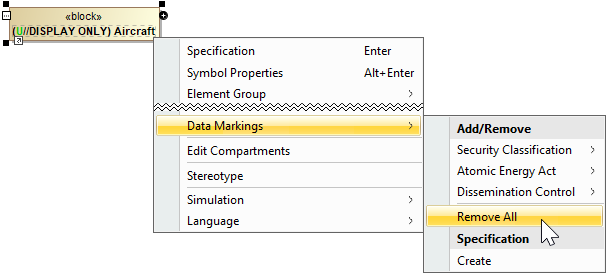
Removing all Data Markings added to an element
To remove all Data Markings added to an element
- Right-click an element or its symbol > select Data Markings in the shortcut menu > in the Add/Remove section, select the Data Marking Category > click Remove All.
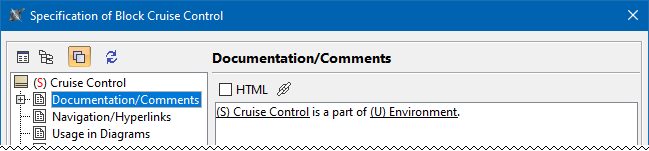
Displaying element Data Markings in documentation hyperlinks
To display element Data Markings in documentation hyperlinks
- Open the Specification window of an element.
- Select the Documentation/Comments property group.
- Write the information you want to document.
- Click the Insert Hyperlink
 button. The Edit Hyperlink dialog opens.
 - For the Text to display option, select Representation Text.
- In the Select element/symbol or paste element URL field, click the three dots
 button.
 - Select the element/symbol in the Select Model Element/Symbol dialog. Click OK.

- Click Close.