Create a style sheet for custom rule-based symbol styles.

Creating a custom style sheet

To create a custom style sheet via the Style Sheets button and apply it to a specific view


  1. Open a specific view. 
  2. Click the Style Sheets button in the view toolbar. In the dropdown menu, click the Create and Apply Style Sheet command.
  3. (Optional) To reuse existing style sheets, drag the needed style sheet's part definition from the Containment tree or use its symbol's Drag and Drop handler and drop it on the new style sheet's symbol, executing the Set Superclassifier command.

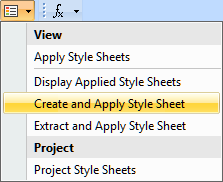
    By reusing an existing style sheet via subclassification, you can create custom rules and customize the rules inherited from the reused style sheet. The reused style sheet can be either a predefined one (e.g., DefaultStyleSheet) or a custom-created one. For example, you can reuse the DefaultStyleSheet style sheet, then customize its rules by changing their names, attributes, and their values, etc. Additionally, if you create rules only for selected symbols, overwriting the DefaultStyleSheet's rules, all the other symbols you do not overwrite will continue to be represented according to the DefaultStyleSheet

  4. You can now:
    1. Create a style sheet condition.
    2. Create rules for the style sheet.
      1. Specify a condition for a rule.
      2. Specify styles for a rule.
    3. Then implement the changes:
      1. Refresh the project to implement the changes by doing one of the following:
        1. Press the F5 key on the keyboard.
        2. In the main toolbar, click View > Refresh
      2. Assess layout-sensitive changes.

A part definition element for the new style sheet is created, and its symbol is displayed in the view. 

The created style sheet is automatically applied to this view. If you prefer to apply it to the entire project, see the (2026x Refresh1) Applying style sheets page.