The Project Merge plugin is required to work on the projects with the enabled Lock-Free Editing mode. The Lock-Free Editing mode cannot be enabled without the plugin as well.
A Lock-Free Editing mode enables users to work with model elements without the need to lock them. Once the option is enabled in Project Options, you can edit elements freely; however, keep it in mind that this is applicable to model elements only. Locks for diagrams, project options, and used projects will persist. In other words, you will still have to lock them before editing.
Recommendation
Assigning different scope of the model to different users is the recommended way to work in the Lock-Free Editing mode to prevent conflicts that may occur when users' changes interfere with each other.
To enable the Lock-Free Editing mode in the project, you need to have the Release Resource Locks permission assigned to you.
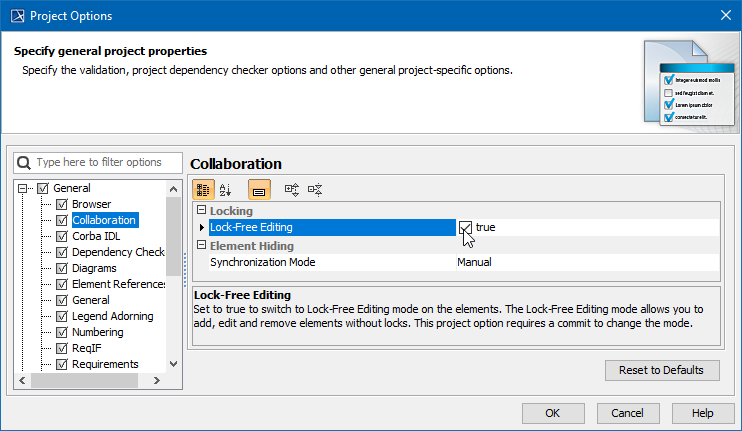
To start using the Lock-Free Editing mode
- In the main menu, click Options > Project.
- In the panel on the left, select General > Collaboration.
- Under the Locking options, enable Lock-Free Editing, and click OK.
In the Question dialog asking whether you want to commit the changes to the server, select Continue.
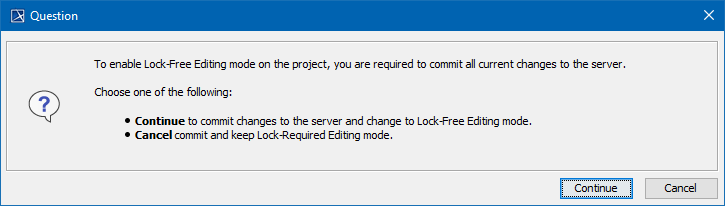
As soon as the Lock-Free Editing mode is enabled, all element locks are released.
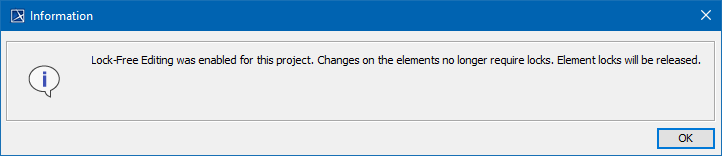
- In the Information dialog, click OK. The Lock-Free Editing mode is enabled.
If the Lock-Required mode is enabled in the project, users who worked without locks will not be able to commit their changes to the server. Therefore, we recommend making sure that all the users working on the model do not have uncommitted changes before switching modes.